
tile spacing guide: how much space to leave between tiles
by clé tile | published: Nov 12, 2026
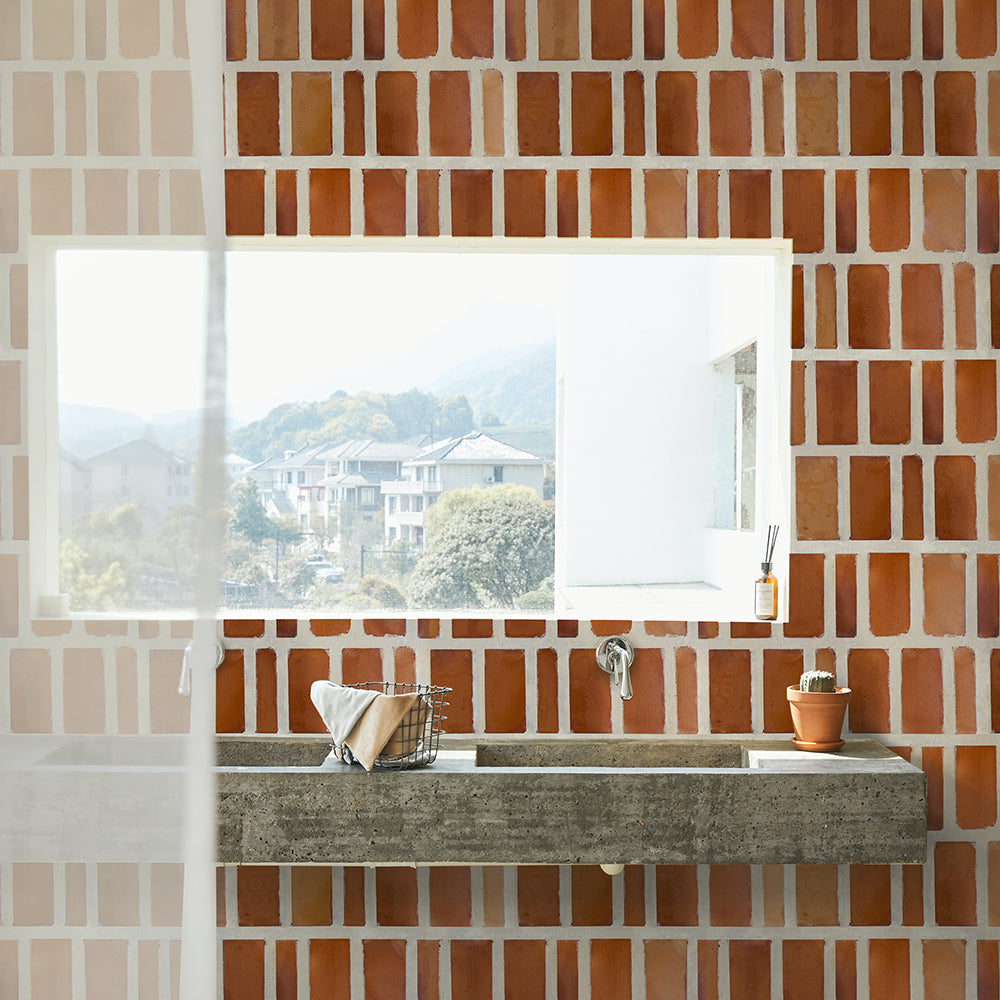
a grout joint may be one of the smallest details in a tile installation, but it has an outsized influence on the finished surface. its width frames each tile, shaping whether a room feels crisp and contemporary or relaxed and old-world. it also affects how the installation accommodates natural variation and ages with everyday use.
so, how much space between tiles is right? the answer depends on the tile's format, material, edge consistency, and intended layout. this tile spacing guide explores standard formats alongside handcrafted materials, where irregular edges make spacing more of an art than a measurement. we'll look at how to choose an appropriate joint, what role spacers play, and why an experienced installer is essential to getting it right.
the short answer on joint width
most tile installations use grout joints between 1/16 and 3/8 inch, though some handcrafted materials, such as clé's antique terracotta and belgian reproduction tile, call for wider spacing. the right measurement depends on the tile's format, the consistency of its edges and dimensions, and the look you want to achieve. material-specific installation requirements and the installer's assessment should determine the final joint width.
from the clean lines of a narrow joint to the more pronounced grid of a wider one, spacing shapes how tile reads across a surface. handcrafted materials bring another consideration: natural variation in size, thickness, and edge shape. layout patterns, room conditions, grout color, and the distinction between grout and movement joints all play a role in creating an installation that's both cohesive and suited to its setting.
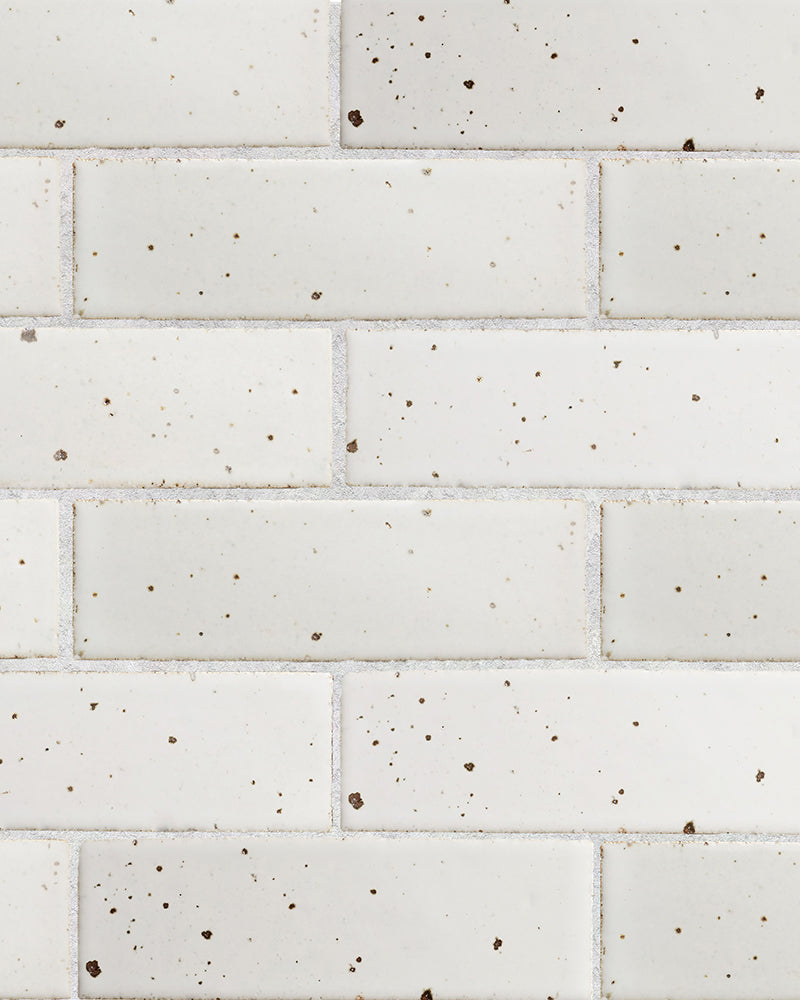
why the space between tiles shapes the whole surface
grout joints do more than fill the spaces between tiles. they frame each piece, establish the rhythm of the installation, and influence how the finished surface looks and performs over time. a narrow joint creates a quieter, more continuous field that lets the tile take the lead; a wider joint makes the grid more visible, adding texture, definition, and an old-world sensibility. the right grout joint size depends on both the character of the tile and the effect you want to create.
the look: from quiet and modern to textural and old-world
narrow grout joints tend to create a clean, restrained look, allowing color, pattern, and material variation to remain the focus. wider joints bring more visual structure to a surface, emphasizing individual tiles and creating a more pronounced, traditional rhythm. neither is inherently more modern or timeless; the relationship between tile and grout is what matters. a joint that's too narrow, however, can make differences in tile size and edge shape more noticeable rather than disguising them. this is especially important with handcrafted materials, where variation is part of the appeal.
the performance: movement, protection, and cleaning
grout joints also have a practical role. they fill the spaces between tiles and help protect the installation from dirt and moisture, while allowing for the small differences in tile dimensions that occur during manufacturing. but grout is not a substitute for properly planned movement joints, which accommodate expansion and contraction in the tile assembly and surrounding structure. those details, along with a stable, properly prepared substrate, are essential to a durable installation.
upkeep matters, too: wider joints expose more grout, which can mean more surface to clean and maintain. grout color affects the finished look and how readily everyday discoloration shows, so test it with your tile before committing. the best choice balances the visual character you want with the material's requirements and the realities of the room.
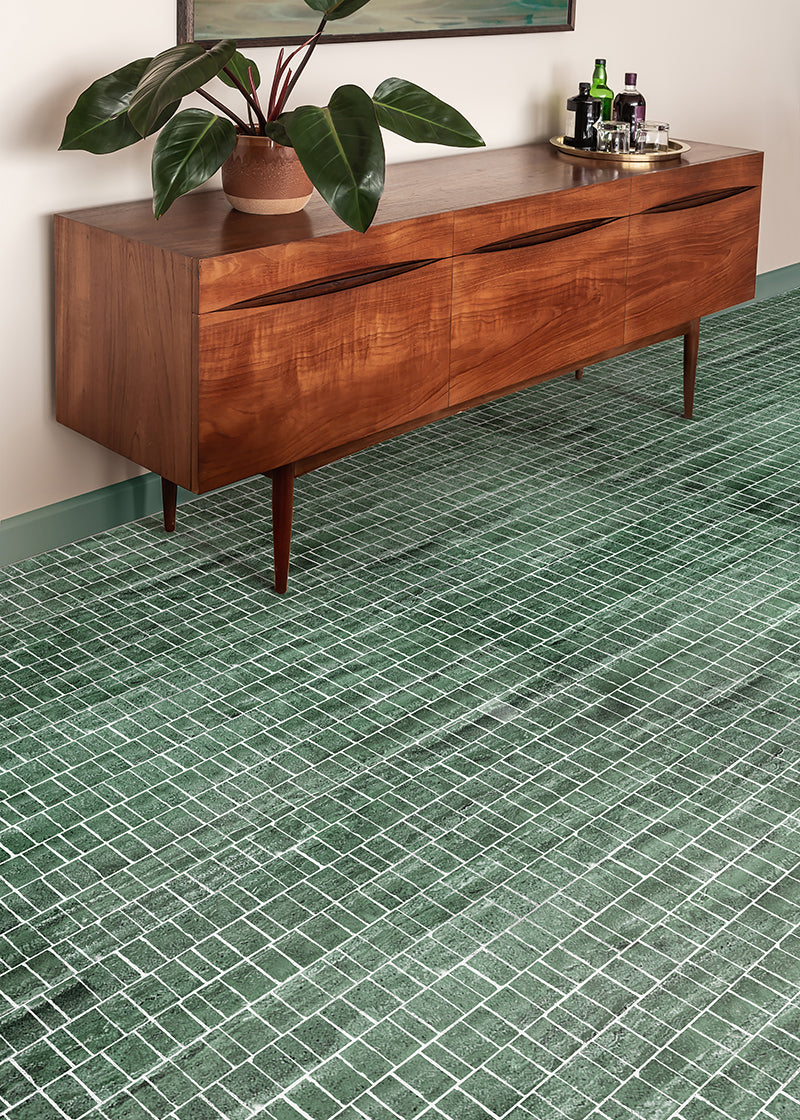
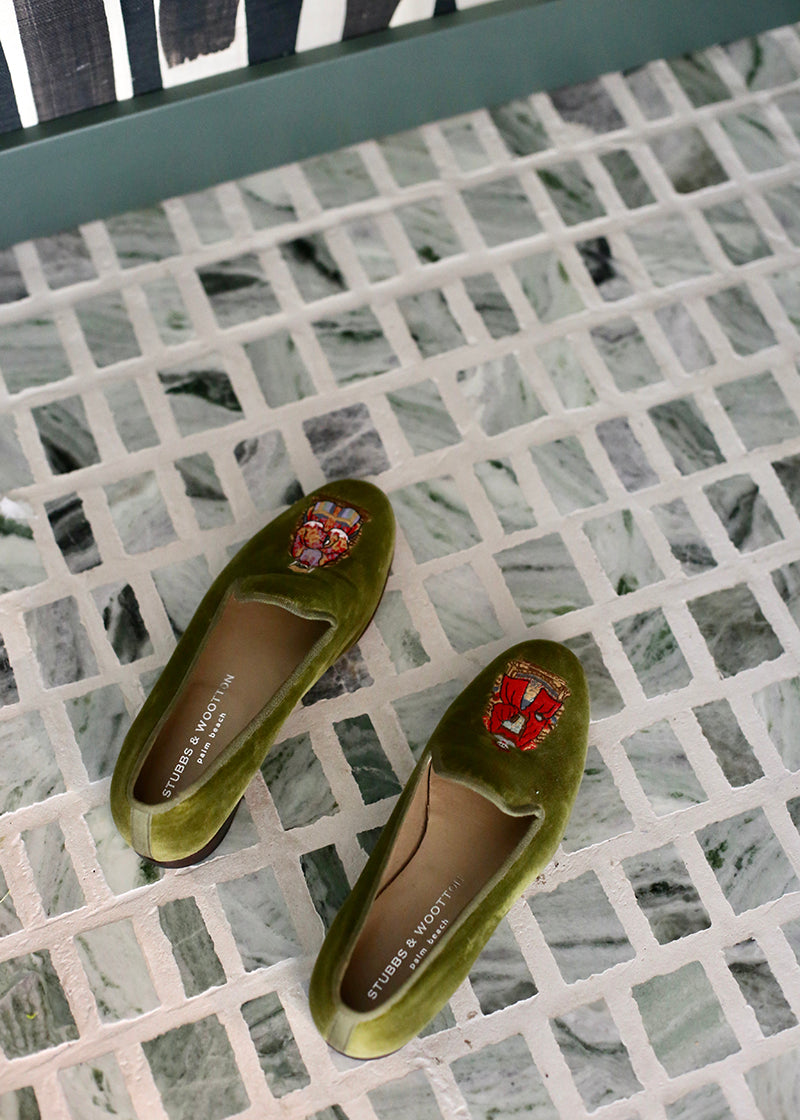
lapidary rough cut mosaic sheet in jade green (large joint) design / photo: debra cass szidon
how much space between tiles, by tile format
tile format is a useful place to start when choosing grout joint spacing, but it doesn't determine the answer on its own. material, edge consistency, and installation pattern all influence how closely tiles can sit together. a precisely cut tile may support a narrower joint, while a handmade piece with irregular edges may need more room to create a balanced layout. use the ranges below as starting points, then check the recommendations for your specific tile before settling on a measurement.
subway tile
subway tile can take on very different character depending on the grout joint. a narrow 1/16-inch joint creates a clean, minimal look that keeps the focus on the tile; a 1/8-inch joint gives the pattern more definition and a little more flexibility during installation. with precisely sized, consistent edges, either can work well. handcrafted subway tile is a different consideration: variations in edge shape and dimensions can make a very tight joint harder to maintain, and a slightly wider joint may create a more even overall rhythm without making the tile itself look uniform. for a closer comparison of the visual and practical differences, see our guide to 1/16 vs 1/8 grout lines.
small format and mosaic tile
smaller tiles generally call for smaller grout joints, often around 1/16 to 1/8 inch. a narrow joint helps preserve the detail of a mosaic or small-format pattern without allowing grout to overwhelm the individual pieces. for sheet-mounted mosaics, pay attention to the spacing between sheets as well as the joints within them. the installer should align the sheet edges so the finished surface reads as one continuous pattern, rather than revealing a grid of larger gaps.
medium and large format tile
medium-format tile offers more flexibility, with joints often falling between 1/8 and 1/4 inch depending on the material and edge quality. larger-format tile may call for joints around 1/8 to 3/8 inch or wider, but the pattern matters as much as the dimensions. offset layouts can make lippage—the height difference between the edges of adjacent tiles—more noticeable, particularly with large rectangular formats. a wider joint may be required by installation standards to help manage that risk, but it does not eliminate lippage or correct uneven tile edges. the tile's dimensional tolerances, layout, and manufacturer guidance should inform the decision; your installer should confirm the appropriate joint before setting begins.
there is also room for a more deliberate design choice: a wider joint can become a visible part of the composition, adding a strong grid or an old-world feel. keep that intention in balance with the tile's scale and material, and confirm that the proposed spacing is compatible with the product's installation requirements.

cement standards in 8x8” federal blue and star bright. design: dae planner design co / photo: reyna robyn photography
grout joint spacing by material
tile format gives you a starting point, but material often has the greater influence on the final joint. the more consistent a tile's dimensions and edges, the easier it is to maintain a uniform gap. handcrafted materials bring a different set of considerations: subtle shifts in shape, thickness, and surface can call for more room and a more responsive installation. the goal isn't to make every tile look identical, but to give the material enough space to read naturally while keeping the overall layout balanced.
ceramic and cement
ceramic and cement tiles with relatively consistent dimensions and edges can generally accommodate narrower, more uniform joints. clé's hand-pressed cement tile, for example, calls for a 1/16-inch grout joint. spacers help maintain that consistent rhythm during installation, even as the tiles bring the color and surface variation characteristic of handmade cement. follow the product-specific instructions in our guide to cement tile installation. ceramic varies more widely by collection: a precisely formed tile may support a tight joint, while a handmade piece with less uniform edges may need additional spacing. always check the guidance for the specific tile rather than treating ceramic as a single category.
stone
natural stone introduces variation in veining, surface, and sometimes dimensions, depending on how each piece is cut and finished. clé's lapidary stone generally calls for a 1/8-inch joint, giving the installation room for the material's characteristics while maintaining a defined grid. rough-cut stone mosaics can have very different spacing requirements, so check the specifications for the exact format rather than applying the standard lapidary recommendation across the collection.
brick
brick tile typically uses a wider joint—around 3/8 inch for clé products. the additional space complements the scale and character of the material, while accommodating the dimensional variation that gives brick its familiar, timeworn quality. here, grout becomes a more visible part of the pattern, reinforcing the coursing rather than disappearing between pieces.
terracotta
terracotta can vary considerably in size, shape, and thickness, particularly in antique and reproduction formats. clé's Belgian reproduction and antique terracotta often call for joints around 1/2 inch, though the installer may need to adjust spacing as individual pieces are set. le sol plank and rectangle formats can also be arranged with intentionally exaggerated joints of 1 inch or more in certain designs.
these are material- and layout-specific decisions, not standard requirements for every terracotta tile. the more variation a tile brings, the more important it is to plan the layout with the actual pieces before installation.
zellige
zellige is defined by variation: hand-cut edges, subtle shifts in thickness, and changes in surface and glaze give each tile its own character. for clé zellige installations in the u.s., the recommended grout joint is 1/16 inch. that relatively narrow spacing allows the individual pieces to sit close while preserving the natural irregularity of the surface. it also asks more of the installer, who must make small adjustments to alignment and spacing as the field develops. explore our collection of zellige tile and follow its product-specific installation guidance.
forage terrazzo
forage terrazzo generally calls for a 1/16-inch joint. its carefully sized format supports a relatively consistent layout, while the aggregate and color variation within each tile provide the visual texture. as with cement and other more uniform formats, a narrow joint keeps the focus on the material rather than introducing a competing grid. confirm the specifications for the particular product before installation.
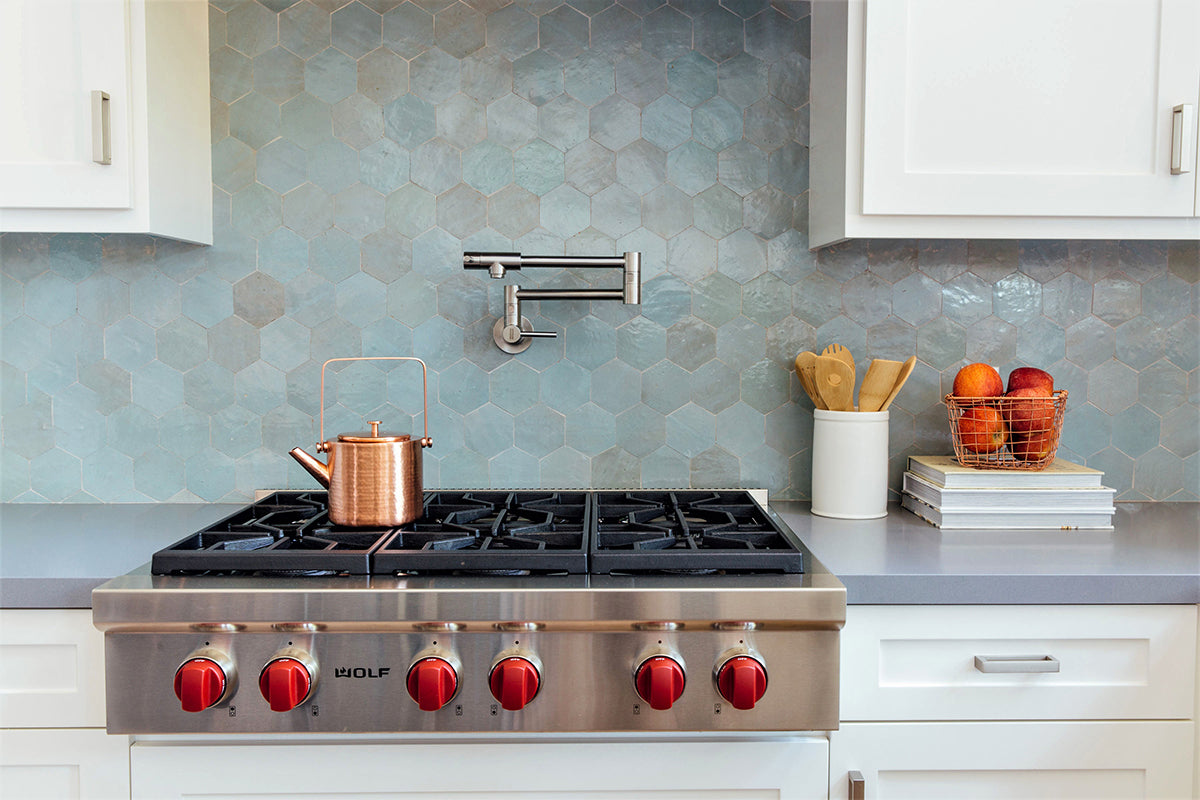
zellige hexagon in tea ceremony. design: michelle lisac interior design / photo: jennie corti photo
spacing handcrafted tile: working with variation
handcrafted tile carries the marks of its making. slight differences in size, irregular edges, shifts in thickness, and variations in glaze or surface are part of what give materials like zellige, terracotta, and handmade ceramic their depth and character. these differences aren't defects to be corrected; they're qualities to work with. grout spacing is one of the ways an installer brings those individual pieces together into a surface that feels considered rather than mechanically uniform.
a wider joint can give irregular tiles more room to settle into a balanced layout, softening the overall grid without hiding the variation that makes each piece distinctive. but wider isn't automatically better. the right spacing depends on the material, the degree of variation, the pattern, and the visual effect you're after. some handcrafted tiles, including clé zellige, are installed with a relatively narrow 1/16-inch joint. others, such as belgian reproduction and antique terracotta, may call for joints around 1/2 inch. the product's installation guidance is the starting point; the actual pieces and the layout determine how that guidance is carried through the room.
thickness deserves particular attention. differences in tile thickness can affect how adjacent pieces meet, but grout width alone won't correct uneven surfaces or prevent lippage. review the specific material's dimensions and tolerances, and see our guide to tile thickness for more on what to expect.
why installer experience matters
an installer familiar with handcrafted tile understands that the job isn't simply to repeat one measurement from wall to wall. before setting begins, they should open multiple boxes, blend pieces to distribute variation, and dry-lay a representative area to assess the pattern, joint width, and overall rhythm. a mock-up can help you see how the tile and grout work together in the room's actual light, giving you a chance to adjust the grout color or spacing before the full installation is underway.
during installation, the installer may need to make small, deliberate adjustments to keep the field visually balanced while respecting the product's recommended joint. spacers can help maintain consistency where appropriate, but irregular handmade edges may require careful placement by eye. the substrate must also be properly prepared, and differences in thickness need to be managed through setting technique—not hidden with wider grout lines.
the work continues after the tiles are set. grout selection and application should follow the material's specifications, and some porous or absorbent tiles require sealing before grouting to help prevent staining. other materials have different sealing requirements, so the installer should follow the product-specific instructions for both grout and tile. choosing someone with demonstrated experience in the material you're installing can make the difference between a surface that simply fits together and one that brings out the character of the tile.
how pattern, layout, and room shape the joint
the right grout joint has to work with more than the tile itself. the installation pattern, the shape of the room, and the way the surface will be used all influence how spacing reads and performs. a joint that looks balanced in a simple grid may feel very different in a diagonal or offset layout, where alignment and the relationship between tile edges become more prominent.
grid, offset, and diagonal layouts
a straight grid creates clear, continuous grout lines, making even spacing especially important to the finished look. an offset pattern breaks up those lines and introduces additional considerations, particularly with larger rectangular tiles. depending on the tile's dimensions and warpage, the installer may need a wider joint to meet installation standards and help manage lippage between adjacent edges. diagonal layouts bring grout lines into sharper focus across the room, so consistent spacing and careful planning matter just as much as the tile's orientation. explore our guide to floor tile layout patterns for more on how pattern changes the character of a tiled surface.
consider the room
room use also matters, though it doesn't determine a grout-joint measurement on its own. in a kitchen backsplash or a low-traffic wall installation, the visual relationship between tile and grout may be the primary consideration. floors and wet areas bring additional practical demands: the grout must be suitable for the application, properly installed, and maintained over time.
a wider joint can provide additional grout surface and may contribute some traction underfoot, but it should never be treated as a substitute for tile with appropriate slip resistance. in showers and other wet areas, choose materials and finishes rated for the intended use, and work with an installer who understands the relevant waterproofing and drainage requirements.
ultimately, optimal tile spacing is the result of several decisions working together: the material's tolerances, the layout, the room's demands, and the visual rhythm you want to create. the product specifications and an experienced installer's judgment should guide the final measurement.
optimal tile spacing: choosing a tighter or wider joint
once you've considered the tile's format, material, and installation pattern, the final decision comes down to balancing the look you want with the needs of the surface. a tighter joint creates a quieter, more continuous appearance, keeping attention on the tile itself. a wider joint emphasizes the grid, adds texture, and can give a surface a more traditional, handcrafted character. neither is automatically the better choice. the best spacing is the one that works with the tile's natural variation and the demands of the room.
before deciding, consider three things:
- the look: do you want grout to recede or become part of the design? a grout color close to the tile creates a more seamless effect, while a contrasting shade makes the pattern and individual pieces stand out. even a narrow joint can become a strong graphic element when paired with contrasting grout.
- the tile: how consistent are its dimensions and edges? precisely cut tiles can often sit closer together, while irregular handmade pieces may need more room and careful adjustment during installation. don't choose a joint so narrow that it fights the material's natural character.
- the room: will the surface see regular foot traffic, moisture, or frequent cleaning? choose grout appropriate to the application and consider how much maintenance you're comfortable with. wider joints expose more grout, which can mean more surface to clean and maintain; narrower joints reduce that area but don't eliminate grout upkeep.
grout samples are worth testing alongside the tile before installation. the same color can look quite different in natural and artificial light, and the joint's width changes how much of that color appears across the finished surface. a small mock-up lets you compare the overall effect before committing. once you've settled on the look, confirm the measurement against the tile's product specifications and your installer's recommendations. that combination—not a single universal number—is the most reliable route to a well-resolved installation.
tile spacers and the installer's eye
tile spacers help maintain consistent grout joints by holding tiles at a set distance from one another as they're installed. they're especially useful with uniform, precisely sized tile, where a repeatable measurement creates a clean, even grid. for materials such as clé's hand-pressed cement tile, spacers help maintain the recommended 1/16-inch joint across the installation.
handcrafted tile can call for a more flexible approach. when edges vary in shape or individual pieces differ slightly in size, relying on spacers alone can produce an awkwardly rigid pattern or make irregularities more obvious. an experienced installer knows when to adjust the position of individual tiles by eye, balancing the spacing across the field while following the product's recommended joint. the goal isn't to force every gap to look identical, but to create a surface that feels cohesive and lets the material's natural character come through.
before installation begins, the designer, homeowner, and installer should agree on the intended joint width, grout color, and overall appearance. reviewing actual tile samples or a mock-up together helps set realistic expectations, particularly with handmade materials. once the first tile is set, changing the spacing can affect the entire layout, so these decisions belong in the planning process—not halfway through the installation.
the other kind of joint: where movement joints belong
grout joints and movement joints serve different purposes, and one cannot replace the other. grout joints are the spaces between individual tiles, filled with grout to complete the surface. movement joints, by contrast, are intentional gaps filled with a flexible sealant or other approved movement-joint material. they allow the tile assembly to accommodate expansion, contraction, and movement in the substrate without transferring that stress directly to the tile or grout.
movement joints are especially important across larger floor installations, where changes in temperature and moisture can cause materials to expand and contract. they may be required within the tiled field at intervals specified by industry standards, as well as around the perimeter of a room, where tile meets walls or other fixed surfaces. they also belong at changes of plane, such as where a tiled wall meets a floor or where two shower walls meet. these transitions should not simply be filled with rigid grout.
the placement and frequency of movement joints depend on the installation, substrate, exposure, and applicable industry requirements. the Tile Council of North America (TCNA) publishes industry guidance for movement joints in tilework; your installer should consult the relevant standards and plan these details before setting begins. a properly sized grout joint creates the intended visual rhythm, while properly placed movement joints help protect the installation as the building and materials move.
a joint decided before the first tile is set
the best grout joint is one that's considered before installation begins. dry-laying a selection of tiles helps reveal how their dimensions, edges, and natural variation work together, while a mock-up lets you see the proposed joint width and grout color against the actual material and in the room's light. these early decisions can prevent surprises once the full installation is underway.
joint width also affects how much tile you need to order. a wider joint can change the overall dimensions of a tiled field and the number of pieces required for a particular layout, while cuts, pattern alignment, and the material's natural variation all influence waste. work with your designer and installer to finalize the layout, confirm the product-specific spacing recommendations, and calculate the order with an appropriate overage before purchasing.
most importantly, make sure everyone agrees on the intended result. an installer experienced with handcrafted tile can help translate the product's specifications and natural variation into a balanced installation, but that conversation should happen before the first tile is set. thoughtful planning gives the material room to show its character—and gives the finished surface the cohesion it deserves.
explore our collection of handcrafted tiles.
questions people ask about tile spacing
can tile be installed with no grout line at all?
some tile traditions use tight, nearly butted joints, but most modern tile installations require a grout joint. even tiles with very consistent edges need room for dimensional tolerances and installation requirements. follow the manufacturer's specifications rather than assuming a zero-joint installation is appropriate.
should sanded or unsanded grout be used with wider joints?
grout selection depends on the joint width, tile material, and grout manufacturer's specifications. sanded grout is traditionally used for wider joints, while unsanded grout is commonly used for narrow joints and delicate surfaces that could scratch. some modern grouts are formulated for a range of widths, so confirm compatibility before choosing.
does a wider joint change how often grout needs sealing?
not necessarily. sealing frequency depends more on the grout type, product instructions, and conditions of use than on joint width alone. wider joints expose more grout surface, but they don't automatically require more frequent sealing. some grouts do not require sealing at all.
can a wider grout line correct uneven tile?
no. a wider joint may help accommodate differences in tile dimensions and edge shape, but it cannot correct uneven tile thickness, lippage, or an improperly prepared substrate. those issues need to be addressed through tile selection, surface preparation, and installation technique.